If you own a PandwaRF Rogue Pro, you may have noticed that we have deployed for a long time now a Data rate Computation feature.
This data rate computation is available in the Rx/Tx page through the Data Rate Compute button, and works as a post-processing step, to compute data rate of already captured data.
This feature is very useful for RF reversing and was recently reworked to have better performance.
In this post we will explain how you can use this feature and why it’s important to follow some basic rules.
To capture data we need 3 important parameters:
- Frequency
The frequency can be found using the Spectrum Analyzer or the Frequency Finder of the RX/TX page. More information about how to find the frequency of the keyfob to capture.
- Modulation
The modulation cannot be automatically guessed, but it is generally OOK.
- Data Rate
The Data Rate, in bits/s, shows the number of bits (0 or 1) that are conveyed per unit of time.
If this value is incorrect the captured data is unusable because the bit length is wrong and we cannot determine how many 0/1 bits are consecutive.
Setting the correct data rate is the trickiest part, but don’t worry, we have created an easy way to determine the data rate.
If you have a Rogue Pro or Rogue Gov, you will be able to use this feature. Follow these 4 steps:
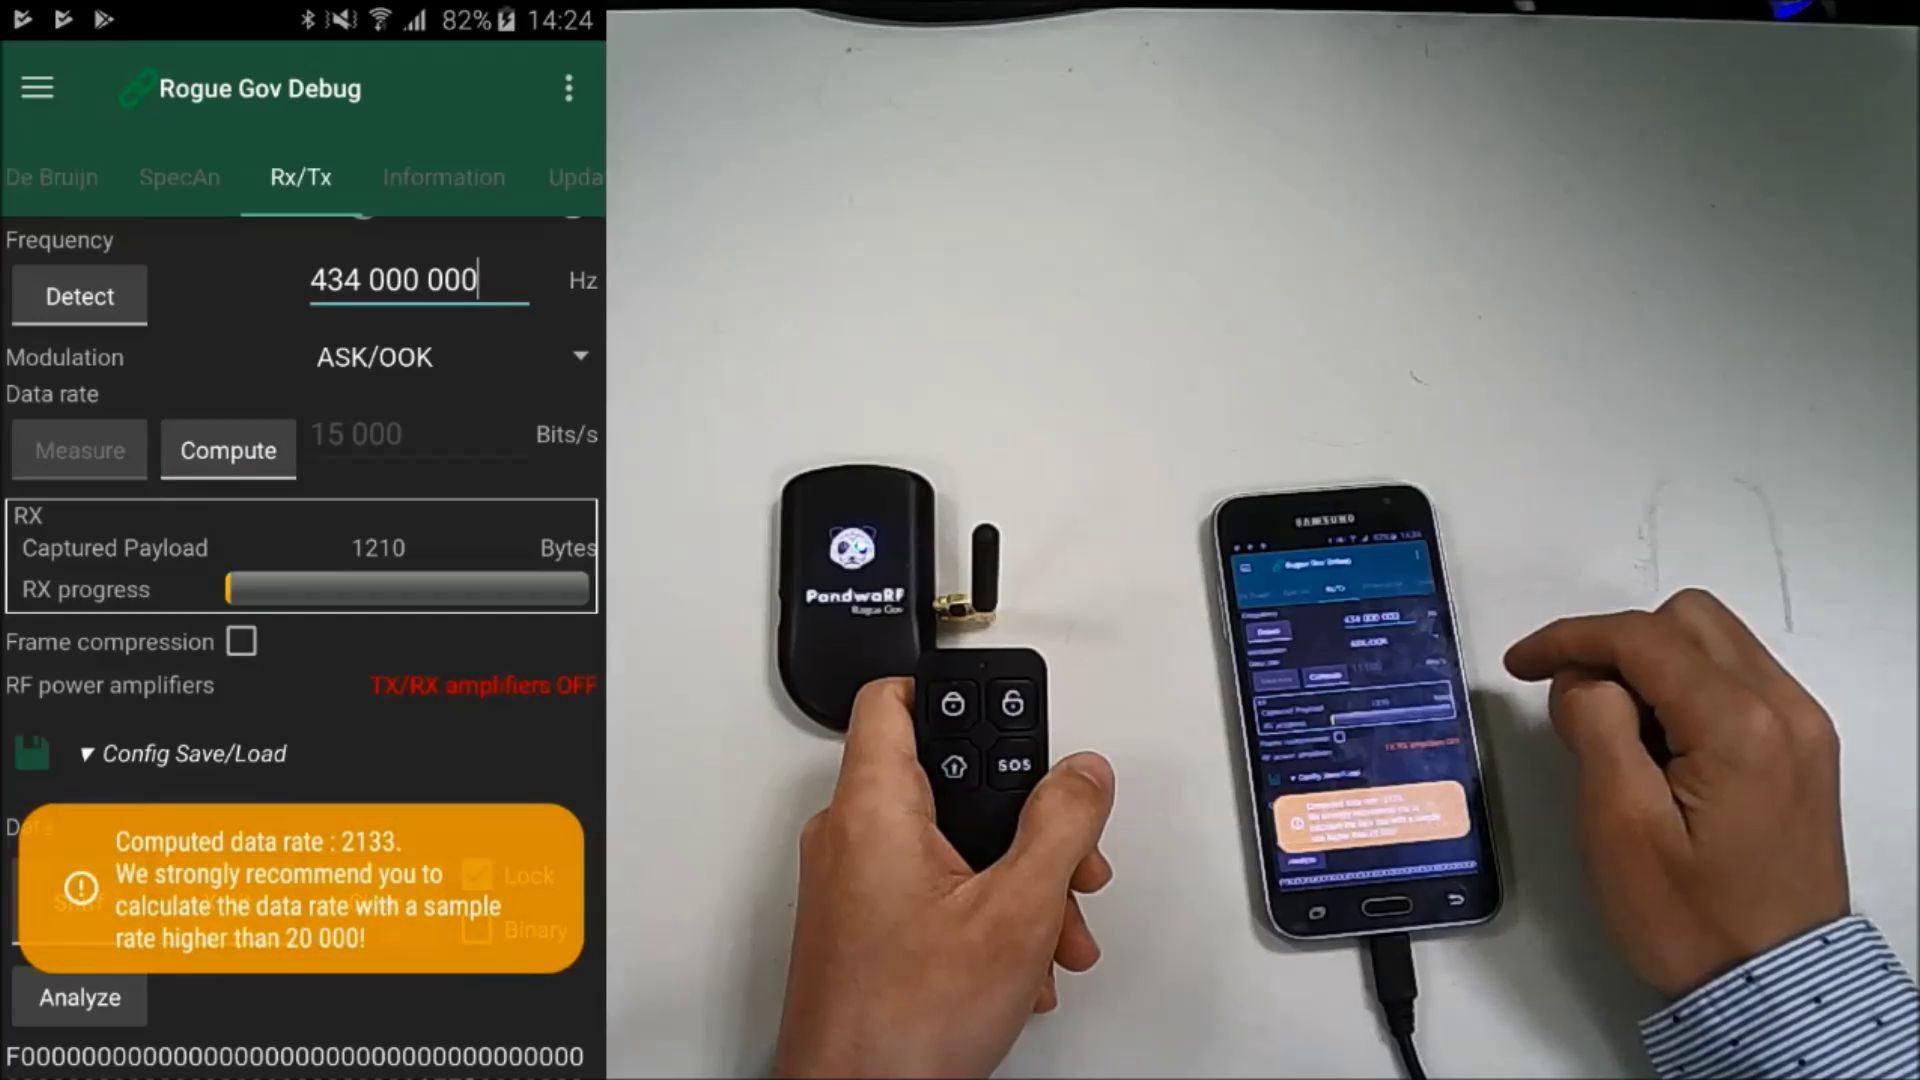
1st Step: Set the frequency
Enter the frequency on which your target remote transmits data.
2nd Step: Set the sampling rate
The sampling rate is the speed at which a bit is captured by PandwaRF.
Note about the differences between sampling rate vs data rate:
- When receiving data, the entered data rate is in fact the sampling rate.
- When transmitting data, the entered data rate is the real data rate, eg. the rate at which the data will be transmitted.
Enter a high sampling rate, in bits/s, in the data rate field. It needs to be higher than the data rate and at least 15000 bit/s to be able to determine the real data rate by observing the bits’ occurrence.
The higher the sampling rate is, the more precise the capture is, but also the bigger the data to send to the Smartphone.
3rd Step: Capture the target’s data
Capture your remote’s data using the Sniff button.
4th Step: Click on the Compute button.
You will then see a message showing the computed data rate. Note that data rate computation can fail if the sampling rate is not high enough compared to the target’s data rate.
Step-by-step procedure:
- Set the sampling rate to 15000 bits/s so that one bit is captured every 66 µs (micro seconds)
- Start the RX capture and press the target keyfob button
- If after capturing data you see sequences of 10 times “0” or 10 times “1”, it means that you have sampled the data 10 times faster than the data is actually transmitted.
- At this step, you can analyze (oversampled) data using the Analyze button, or continue to step 5.
- You can optimize data capture and lower the sampling rate to 1500 bits/s (15000 bits/s / 10).
- Set the sampling rate to 1500 bits/s so that one bit is captured every 666 µs (micro seconds)
- Start the RX capture and press the target keyfob button
- After capturing data you should see sequences of “0” or “1”, it means that you have sampled the data at the exact data rate the data is actually transmitted.
- At this step, you can analyze data using the Analyze button
Here is a demo video showing this feature.
Enjoy!